The Orbonne Monastery
The Orbonne Monastery
- Level
- 70 (Sync: 70)
- Item Level
- 365
- Difficulty
- Normal
- Party size
- Alliance
24 man • 3 6
6  15
15 
- Unsyncing
- Allowed
- Time limit
- 120 minutes
- Duty Finder
- Alliance Raids (Stormblood)
- Roulette
- Alliance Raids
- Tomestones
 100
100  100
100  12
12 - Req. quest
 The City of Lost Angels
- Entrance
- The Prima Vista Bridge (X:6.3, Y:6.1)
- Location
- The Orbonne Monastery
- Region
- ???
- Patch
- 4.5
 The Echo
- Permanent +10%
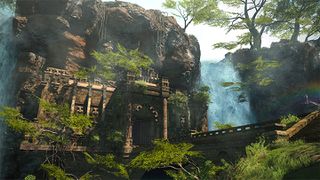
“Beckoned by the auracite, you arrive at the Orbonne Monastery─vestige of an ancient civilization lost beneath the twisted roots and vines of a forbidden jungle. The Durai Papers claim this holy sanctuary to be where the tale of young Ramza Beoulve began. Tonight, it is where your tale ends.
— In-game description
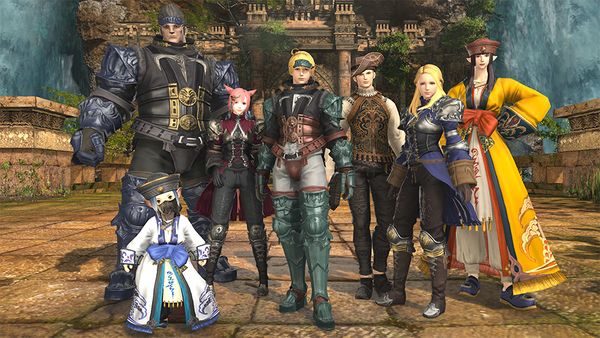
The Orbonne Monastery is a level 70 raid introduced in patch 4.5 with Stormblood. It is the third part of Return to Ivalice.
Objectives
- Clear the Jungle's Plea: 0/1
- Clear the Realm of the Machinists: 0/1
- Clear the Realm of the Templars: 0/1
- Clear the Lifeless Alley: 0/1
- Clear the Realm of the Thunder God: 0/1
- Clear the Crystalline Gaol: 0/1
Enemies
The Jungle's Plea
The Lifeless Alley
Bosses
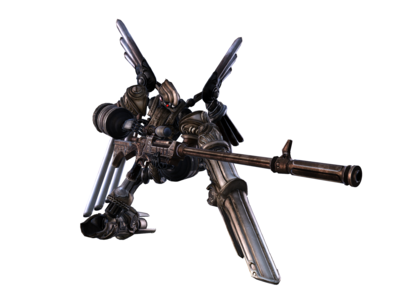
 Mustadio
- Energy Burst: Raid-wide AoE
- Arm Shot: Tank Buster
- Leg Shot: Places a land mine beneath three random players. If a player runs into a mine, it explodes for high damage and inflicts
 Paralysis.
 - Left/Right Handgonne: Hits the entire left or right side of the boss, plus an additional 30-degree overlap to the boss's front. The first time this is cast, it will be cast again on the opposing side immediately afterwards.
- Maintenance: Boss tethers two to six robots inside and around the arena. Outside robots attack a line directly across the arena. Inside robots attack the quadrant they're in.
- Ballistic Missile: Player-targeted AoE on one random player from each Alliance.
- Searchlight: Floor markers track targets and detonate, similar to Phantom Train's spotlights.
- Analysis + Last Testament: Ground, circle marker placed on each player with an opening on a side. Boss jumps out of the arena and appears randomly on the outside. Position character such that gap in the circle-marker around the character faces the boss by the time the cast finishes. The first time Mustadio casts this attack, a cutscene plays showing him lining up his shot while simultaneously allowing the players to determine his position. Afterward without the cutscene, less time is available to locate the boss and position accordingly.
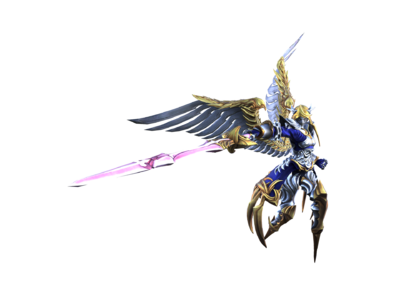
 Agrias
NOTE: Throughout the fight, two types of special AoEs will spawn, each giving a specific Duty Action. The golden Shieldbearer makes the user immune to damage from the front. Moving or using other abilities while Shieldbearer is active will end the effect. The silver Swordbearer grants a short 180 degree arc attack that deals high damage to shielded enemies.
- Divine Light: Raid wide damage.
- Thunder Slash: The main tank is targeted with a red arrow. After a short delay, Agrias will launch a cone attack at the targeted player, dealing extremely high damage that is nearly guaranteed to kill non-Tanks.
- Judgment Blade: AoE Knockback and inflicts
 Vulnerability Up. To avoid, step into one of the Shieldbearer light pillars, face the boss, and use the duty action Holy Shield.
 - Cleansing Blade: Six player-targeted AoEs on two players from each alliance.
- Cleansing Strike: One random alliance is pulled into another area where they are inflicted with a 1-minute
 Doom debuff and must slay all of the Tainted Soul and Taintless Soul adds that spawn. Tainted Souls slowly move toward the center of the area, where they explode for high damage and inflict
  Vulnerability Up. Taintless Souls stay put, but are highly resistant to any attack that isn't from the Sword duty action, and if left alone, will cast an attack that deals high damage. Once all of the adds have been killed, the Doom debuff will be dispelled and the alliance will be returned to the arena.
 - Consecration: Used immediately after Cleansing Strike. Two Swordbearer circles will spawn, and one of the two remaining alliances will be trapped within Halidom adds and pulled to specific areas around the arena. Several untargetable Ephemeral Knight adds will launch line attacks across the arena, through each trapped alliance member. The remaining alliance's goal is to use the Sword duty action to destroy the traps holding the other alliance members captive.
- Hallowed Bolt: Two random players are marked for an AoE attack that hits twice in succession: Once as a circle AoE centered on the player, and once as a ring AoE centered on the player, with an inner radius equal to the prior circle AoE.
- Heavenly Judgment: Agrias begins charging up a Holy Blade meter. Two Sword Knight adds and one Shield Knight add spawn, along with two Shieldbearer and two Swordbearer circles. The two Sword Knights will cast Mortal Blow, dealing damage in a massive circle around them, which can be negated by using the Shieldbearer duty action. Meanwhile, a Swordbearer circle will spawn, alongside four Emblazoned Shield adds that tether to the Shield Knight and make it Invulnerable. These adds can be destroyed by using the Swordbearer duty action. If Agrias's Holy Blade meter reaches 100, Heavenly Judgment will wipe the raid.
- Divine Ruination: One random player from each alliance becomes tethered to Agrias, while two Shieldbearer circles spawn. After a short delay, Agrias will launch a highly-damaging line attack at each tethered player. Tethered players should acquire and use the Shieldbearer duty action to negate this damage. Non-tethered players can avoid damage by either using the Shieldbearer action or simply staying away from the tethered players.
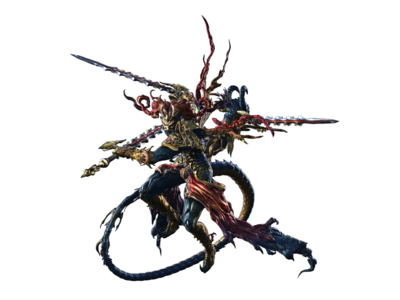
 The Thunder God
Note: Auto-attacks will hit the tank of each party, not just a single tank.
- T.G. Holy Sword:: Mechanic depends on the boss's animation as he casts the ability:
- Swords stabbed in ground: Get close, AoE hits all but the innermost arc of each circular platform.
- Swords held sideways: Get away, AoE hits all but the outermost arc of each circular platform
- Swords raised over platforms: Stay off the circular platforms the swords are held over. Note that the AoE also hits the narrow area joining the attacked platform to the two adjacent to it. This version can either target every other circular platform, leaving a safe platform in between, or it can target a sequence of 3 platforms rotating clockwise or counterclockwise.
- Cleansing Strike: Reduces entire alliance to 1 HP and inflicts a
 Doom that is dispelled when those afflicted are healed to full hit points.
 - Duskblade: Creates a small circle on the innermost arc each of the six platforms. Each circle requires 3 players to stand in it to reduce the damage, indicated by 3 arcs within the circle animation. When a circle is occupied by three or more players, curved spikes will erupt from the circle. This deals no damage, being purely an indicator that the circle is filled.
- Shadowblade: Marks one player in each alliance with a large black AoE. When the attack goes off, each target will take moderate damage and a gradually-expanding black spheres will spawn on the spot each target was standing at the time. Standing inside the orbs inflicts a strong
 Bleed debuff, but the true danger of Shadowblade comes from allowing two spheres to overlap. Any spheres that intersect each other at any point will inflict a stack of a highly-damaging
  Bleed debuff to the entire alliance for each sphere (as two spheres are needed to actually overlap, the alliance will always be afflicted with at least two stacks of the debuff). Later on in the fight, two players in each alliance will be marked for this attack, with very little room for error to avoid overlap.
 - Crush Helm: Each party's tank receives 4 stacks of a dispellable
 Slashing Resistance Down debuff, followed by a tank buster.
 - Crush Armor: The boss tethers to each alliance's tank that strikes the tethered player with an attack that deals extremely high damage and inflicts a stack of
 Physical Vulnerability Up four times, with a noticeable delay between each attack. The tanks should immediately pass the tether off to another party member and avoid taking any of the stacks inflicted by this ability, as the debuff drastically increases the damage taken from the boss's auto-attacks. Other players in each alliance should hand off the tether after each attack lands, to avoid receiving more than 1 stack of the debuff. Only a tank can survive two strikes of Crush Armor, but this will almost guarantee death to the next auto-attack received.
 - Crush Weapon: One player in each alliance is marked with a three-pronged black crosshair over their head, eventually dropping a large AoE beneath their feet that deals damage and inflicts
 Physical Vulnerability Up. The AoE will chase the player, striking four times in quick succession before ending. Note: running around the edge of one of the circular platforms is insufficient to escape the chasing AoE, players need to run in a relatively straight line away from the initial AoE.
 - Colosseum: The boss becomes untargetable and launches the entire raid to a new flat and open arena, then spawns three Ephemeral Knight adds and begins charging a Swordplay gauge. If this gauge reaches 100 before all 3 adds are killed, the raid will wipe.
- Hallowed Bolt (1): One player in each alliance is marked with a red arrow that eventually creates a circle AoE followed by a ring AoE outside it (or vice-versa) centered on the target. Getting hit by this attack deals moderate damage and inflicts a strong, non-dispellable
 Electrocution damage over time debuff. Note that the ring AoE is large enough to reach the other alliances if the player with the debuff runs too far to the side or towards the center of the arena.
 - Hallowed Bolt (2): Stack marker on one player in each alliance. In addition to dealing damage, the attack also inflicts a very short
 Magic Vulnerability Up debuff on those hit.
 - Divine Ruination: One player in each alliance is marked with a purple arrow and is tethered to the boss. After a short delay, the adds will launch a wide line AoE at their respective marked target. Stick to the edges of the arena to prevent your party's add from hitting the other parties.
- Hallowed Bolt (1): One player in each alliance is marked with a red arrow that eventually creates a circle AoE followed by a ring AoE outside it (or vice-versa) centered on the target. Getting hit by this attack deals moderate damage and inflicts a strong, non-dispellable
- Balance Asunder: Heavy raid-wide damage based on how far the Swordplay bar filled during add phase. If the boss was allowed to reach 100% before the adds were killed, his attack will wipe the alliance. If the alliance survives the attack, they will be returned to the initial platform.
- Crush Accessory: An ice puddle will spawn, covering the entire arena save for the six furthest points from the boss on each of the circles. Players are inflicted with
 Frostbite for as long as they stand in the puddle. Three Icewolf adds will each spawn in half of the safe areas and begin to slowly cast Burst, killing the add, but dealing very high damage to the entire alliance and inflicting a stack of
  Vulnerability Up. Once all of the adds are killed, the ice will be removed.
 Ultima, the High Seraph
Phase 1:
- Ultima is embedded in a wall for the first phase of the fight. In this phase, Ultima is considered omni-directional for the purposes of position-based abilities.
- Holy IV: Targets the ground under several random alliance members, while also marking several other players with targeted AoEs that must be spread apart. Both sets of attacks deal heavy damage.
- Auralight: Large melee-range AoE coupled with three line AoEs, all of which deal extremely high damage. The line AoEs will leave behind unpassable walls of ice, restricting movement temporarily. The boss usually casts Holy IV immediately after this, requiring the raid to avoid the ground-targeted and player-targeted AoEs in the more limited area between the walls.
- Flare IV: Two random players are marked with player-targeted proximity AoEs and should stand clear of the rest of the alliance.
- Grand Cross: Three untargetable Auracite Shard adds will sequentially fall from the ceiling in square AoEs, instantly killing anyone caught beneath them as they land. After all three have landed, each one will simultaneously cast a highly-damaging cross-shaped attack, leaving only a single "square" of the arena safe from this attack. In the first phase, the safe zone will always be in the "row" closest to Ultima.
- Demi-Aquarius: Summons Demi-Famfrit, who will cast Dark Ewers to travel across the arena in lines. At the same time, Ultima will cast Auralight.
- Demi-Aries: Summons Demi-Belias to cast Time Eruption. Stand on a slow clock until the fast clocks detonate, then move to where a fast clock used to be. At the same time, Ultima will cast Holy IV. Unlike Belias's fight, the clocks are not in a set pattern.
- Demi-Leo: Summons Demi-Hashmal who will create and cut down two Control Towers. Ultima will cast Holy IV again, so players may need to dodge it while also avoiding the falling towers.
Ultima will then re-summon all 3 for a three-round combo attack:
- First combo:
- Belias will cast Time Eruption, covering the arena in the fast and slow exploding clock faces
- Famfrit will cast Dark Cannonade, marking up all players in a random party with red triangles. The marked players must stack on top of at least one other triangle-marked player to prevent damage and knock-up.
- Hashmal will cast Earth Hammer, creating a large weight over a random spot in the arena that will fall after the other two attacks have resolved, dealing proximity-based damage.
- Second combo:
- Famfrit will cast Dark Ewer, creating ewers that travel in a straight line across the arena.
- Hashmal spawns on the east or west edge of the arena and begins to channel Extreme Edge, coating one of his arms in flames and then charging through the center of the arena, dealing extreme damage to the area he charges through and the entire (north or south) half of the arena on the side of his flaming arm.
- Belias will cast Eruption, marking up one random player in each alliance, creating three sequential AoEs below them.
- Third "ultimate" combo:
- Hashmal will slowly cast Landwaster.
- Famfrit will slowly cast Tsunami.
- Belias will slowly cast Hellfire.
- Halfway through their ultimate casts, the three demi-Lucavi will be slain by Mustadio, Agrias, and Orlandeau.
Phase 2:
- Ultima will begin casting Ultimate Illusion. Midway through the channel, the Zodiac Braves will create a barrier. Stand inside of it.
- Ultimate Illusion will destroy the floor everywhere except within the bubble, instantly killing any player who wasn't inside the barrier.
- The entire alliance will take moderate damage over time.
- Ultima will transform and invade the bubble, becoming a targetable Ruination. The barrier will rapidly take damage while the Ruination is alive, so the entire alliance must quickly work to destroy it. If the barrier is destroyed by the Ruination, the alliance wipes.
- Eventually the barrier will shatter and the damage the alliance takes every second from Ultimate Illusion will increase.
- As Ultima prepares for the final hit, Ramza will block it. The last remnants of the platform are destroyed, and the alliance is dropped into a new arena.
Phase 3:
- Ultima will descend to the arena, now fully mobile and no longer omni-directional. If the alliance wipes, the fight will begin at Phase 3 from now on.
- Redemption: High-damage tank buster.
- Demi-Virgo: Can summon one of three types of untargetable Dominion adds. Below are the adds in the order they initially appear in the encounter:
- The first type spawn on the edges of the arena, casting north-south line AoEs across the arena.
- The second type create several small arrows on the arena that move in the direction they are pointing until they become an empty circle. Players must step into these circles to begin Clashing with an add, taking a small amount of personal damage from Penultimania as well as granting the player a Fearless buff, increasing the damage they deal for a short time. If an add is not intercepted, it will use Ultimate Flare, dealing high damage to the entire alliance and inflicting a stack of
 Vulnerability Up.
 - The third type is a single add that spawns within the arena (but is still untargetable), tethers to a player, and gradually deals damage to them with Life Drain. If another player intercepts the tether, they will gain the Fearless buff.
- Eastward/Westward March: Shifts all adds East or West right before their AoEs go off. This is always cast immediately after the first set of Demi-Virgo adds, causing the area initially telegraphed as being hit by the AoEs to be the safe area, and vice-versa.
- Grand Cross: The same as before, but will be combined with an Eastward or Westward March pushing the auracites before their AoEs. The row Ultima occupied in the first phase is now able to have an Auracite Shard drop into it. The shift will occur between the 2nd and 3rd auracites being spawned, so only the first two are pushed.
- Embrace: Taken directly from Rofocale, several small blue AoEs will appear on the arena, becoming invisible after a few seconds, but occasionally flashing. Any player that walks over one of the AoEs causes it to burst from the ground, dealing moderate damage and inflicting Bind on all nearby players. The area hit by the explosion is larger than the trigger radius of the trap.
- Cataclysm: Knocks all alliance members to the back of the arena, stuns them, places an Acceleration Bomb on the entirety of one random party, and creates a mini-maze to Ultima. Players must navigate the maze, pausing when the Acceleration Bomb timer runs out. If they take too long, an AoE starting at the back of the arena will move forward and kill them. While inside the maze, all player abilities are disabled, only regaining the use of them while inside Ultima's hitbox. Within the maze, small circle AoEs will randomly appear, and adds will spawn to drop larger AoEs below themselves. Once Ultima has been reached, she will target a few players with Holy IV or Flare IV; the targeted players must run back into the maze to avoid splashing damage onto the raid. After a while, Ultima will return the arena to normal and begin reusing her attacks until she is defeated.
Loot
- See also: Ivalician Armor (iLvl 390)
 Mustadio
| Name | Type | Item Level | Rarity | Quantity |
|---|---|---|---|---|
| Ivalician Brave's Circlet | Head | 390 | Blue | 1 |
| Ivalician Brave's Greaves | Feet | 390 | Blue | 1 |
| Ivalician Holy Knight's Boots | Feet | 390 | Blue | 1 |
| Ivalician Holy Knight's Circlet | Head | 390 | Blue | 1 |
| Ivalician Mercenary's Circlet | Head | 390 | Blue | 1 |
| Ivalician Mercenary's Greaves | Feet | 390 | Blue | 1 |
| Ivalician Mystic's Hat | Head | 390 | Blue | 1 |
| Ivalician Mystic's Shoes | Feet | 390 | Blue | 1 |
| Ivalician Oracle's Mask | Head | 390 | Blue | 1 |
| Ivalician Oracle's Shoes | Feet | 390 | Blue | 1 |
| Ivalician Royal Knight's Boots | Feet | 390 | Blue | 1 |
| Ivalician Royal Knight's Circlet | Head | 390 | Blue | 1 |
| Ivalician Sky Pirate's Hat | Head | 390 | Blue | 1 |
| Ivalician Sky Pirate's Shoes | Feet | 390 | Blue | 1 |
 Agrias
| Name | Type | Item Level | Rarity | Quantity |
|---|---|---|---|---|
| Ivalician Brave's Gauntlets | Hands | 390 | Blue | 1 |
| Ivalician Brave's Trousers | Legs | 390 | Blue | 1 |
| Ivalician Holy Knight's Gloves | Hands | 390 | Blue | 1 |
| Ivalician Holy Knight's Trousers | Legs | 390 | Blue | 1 |
| Ivalician Mercenary's Gauntlets | Hands | 390 | Blue | 1 |
| Ivalician Mercenary's Trousers | Legs | 390 | Blue | 1 |
| Ivalician Mystic's Bottoms | Legs | 390 | Blue | 1 |
| Ivalician Mystic's Halfgloves | Hands | 390 | Blue | 1 |
| Ivalician Oracle's Bottoms | Legs | 390 | Blue | 1 |
| Ivalician Oracle's Halfgloves | Hands | 390 | Blue | 1 |
| Ivalician Royal Knight's Gloves | Hands | 390 | Blue | 1 |
| Ivalician Royal Knight's Trousers | Legs | 390 | Blue | 1 |
| Ivalician Sky Pirate's Plunder | Hands | 390 | Blue | 1 |
| Ivalician Sky Pirate's Trousers | Legs | 390 | Blue | 1 |
 The Thunder God
| Name | Type | Item Level | Rarity | Quantity |
|---|---|---|---|---|
| Ivalician Brave's Greaves | Feet | 390 | Blue | 1 |
| Ivalician Brave's Jacket | Body | 390 | Blue | 1 |
| Ivalician Holy Knight's Armor | Body | 390 | Blue | 1 |
| Ivalician Holy Knight's Boots | Feet | 390 | Blue | 1 |
| Ivalician Mercenary's Greaves | Feet | 390 | Blue | 1 |
| Ivalician Mercenary's Jacket | Body | 390 | Blue | 1 |
| Ivalician Mystic's Coat | Body | 390 | Blue | 1 |
| Ivalician Mystic's Shoes | Feet | 390 | Blue | 1 |
| Ivalician Oracle's Coat | Body | 390 | Blue | 1 |
| Ivalician Oracle's Shoes | Feet | 390 | Blue | 1 |
| Ivalician Royal Knight's Armor | Body | 390 | Blue | 1 |
| Ivalician Royal Knight's Boots | Feet | 390 | Blue | 1 |
| Ivalician Sky Pirate's Jacket | Body | 390 | Blue | 1 |
| Ivalician Sky Pirate's Shoes | Feet | 390 | Blue | 1 |
 Ultima, The High Seraph
| Name | Type | Item Level | Rarity | Quantity |
|---|---|---|---|---|
| Wind-up Ramza | Minion | N/A | Basic | 1 |
| Ultima, the High Seraph Card | Triple Triad Card | N/A | 1 | |
| Under the Stars Orchestrion Roll | Orchestrion Roll | N/A | Basic | 1 |
| Pressure (No. 1) Orchestrion Roll | Orchestrion Roll | N/A | Basic | 1 |
| Antipyretic Orchestrion Roll | Orchestrion Roll | N/A | Basic | 1 |
| A Man Consumed Orchestrion Roll | Orchestrion Roll | N/A | Basic | 1 |
| Ultima's Perfection Orchestrion Roll | Orchestrion Roll | N/A | Basic | 1 |
Rewards
Each party in the alliance will receive its own treasure chest, the contents of which will be identical regardless of the route taken.
- Players cannot open a treasure chest belonging to another party.
Completion Reward
- Upon completing The Orbonne Monastery, players will also earn 2 Cracked Cluster per run.
Achievements
This duty is associated with the following achievements:
| Name | Points | Task | Reward | Patch |
|---|---|---|---|---|
| Orbonne to Pick | 5 | Complete the Orbonne Monastery. | - | 4.5 |
| Mapping the Realm: The Orbonne Monastery | 10 | Discover every location within the Orbonne Monastery. | - | 4.5 |
Images
Gear Images
Dungeon Images
Concept Art
Trivia
- The story for this raid was written by guest creator Yasumi Matsuno, director and writer of titles such as FINAL FANTASY TACTICS and FINAL FANTASY XII. The boss designs are from of guest creator Keita Amemiya, creator and director of the GARO series.
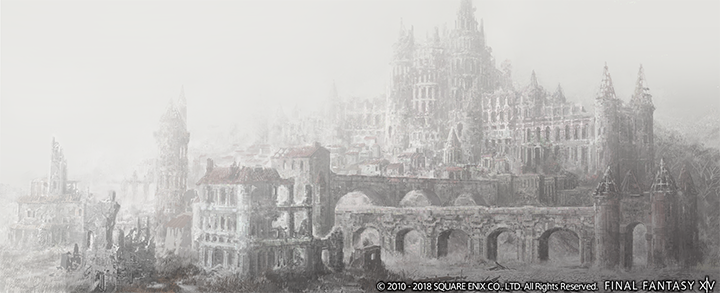
- This location is directly based on the Orbonne Monastery from Final Fantasy Tactics.
Dialogue
Duty Dialogue
Fran: The ruins of the monastery lie ahead, but do not think the path will be easy.
Montblanc: The aether here feels...corrupted, kupo...
Fran: Harpies? My sisters would not allow this... Unless...
Montblanc: We probably shouldn't go barging in there alone, kupo!
Fran: Impressive. Perhaps you are deserving of your accolades. But do you have an answer for this...this Mist? Or is it aether?
Fran: Only the name of these ruins lives on with my people. We have no knowledge of their past, nor do we wish it. Trespass into the monastery is avoided except when necessary.
Montblanc: I imagine this is what it is like to be swallowed by a morbol, kupo!
Fran: Ahead! I see someone... No... Something.
Montblanc: There are traces of aetherial residue here. Most likely from auracite, kupo.
Mustadio: My name is Mustadio Bunansa...and all paths lead through me.
Mustadio: Watch this!
Mustadio: Nothing I cannot fix!
Mustadio: I see you!
Mustadio: You show promise. But promise won't save you from what comes next!
Mustadio: Let this be your final testament!
Mustadio: And where might you be off to?
Mustadio: I rarely miss.
Mustadio: Tell me... What is your darkest fear?
Mustadio: You have proven yourself deserving of the title, Zodiac Brave. With this my journey can, at long last, come to an end.
Fran: The last time I was here, the only thing holding watch over these stones was a deafening silence. Could it be that guardian rose from its slumber upon sensing your master's auracite?
Montblanc: The aether here is different. Is this...joy I feel, kupo?
Fran: When the Empire marched upon Rabanastre, many who lived in the desert fled east to the sanctuary of the jungle. Some who were not turned away by my sisters are said to have taken refuge here.
Montblanc: This wine looks good enough to drink! Do you think we should─? No? Alright, kupo...
Fran: There! Another...Lucavi? It appears to be a knight, but how─
Montblanc: There is much pain in the aether here. A great loss, kupo...
Agrias: The Beoulve youth guides your fate, but have you the faith to fulfill his legacy?
Agrias: Raise your shields against the falling light!
Agrias: To the current of life we succumb, its judgment swift and final. Its bite as cold as steel.
Agrias: The hearts of men are black with corruption and must needs be cleansed!
Agrias: Raise your swords against the coming night!
Agrias: Seven shadows cast, seven fates foretold. Yet at the end of the broken path lies death, and death alone.
Agrias: I call out to the skies and tremble as the brilliance of a thousand bolts blinds mine enemies and tears their flesh asunder.
Agrias: To the current of life we succumb, its judgment swift and final. Its bite as cold as steel.
Agrias: The dreams of men are fleeting, yet they must be embraced if they are to flourish. Have you the faith to do as much?
Agrias: O, divine light! Send us from our sins!
Agrias: Gaze deep into the light!
Agrias: They who dwell aloft have spoken. Let their words echo in your empty soul. Ruination is come!
Agrias: The hearts of men are black with corruption and must needs be cleansed!
Agrias: Well fought, champion. I leave you now to your quest. My Ovelia awaits...
Fran: She was a knight most noble, and her sacrifice will not be forgotten. My sisters will want to know much of her tale, I believe.
Montblanc: Let me guess, someone from the Durai Papers, kupo?
Fran: The path ends here, but for that arcane circle. Do you believe it some sort of gate?
Montblanc: That arcane circle is somehow connected to the auracite! I can feel it, kupo!
Fran: Something here feels different than the monastery above... Otherworldly...
Montblanc: I'm going to go out on a limb and guess this place is fairly old, kupo.
Fran: Can you not feel it? An evil lurks here...one far beyond our ken.
Fran: Once, when I was very young, I heard the elders speak of a dark city where the horrors that haunt our nightmares dwell. The Necrohol, they called it─the Necrohol of Mullonde.
Montblanc: Mullonde? Now where have I heard that name before, kupo?
Fran: This...guardian─he is not like the first two. We must tread with care, lest our journey meet a premature end.
The Thunder God: Your coming was foretold, servant of Ivalice. Or perhaps you serve another.
The Thunder God: I am Count Cidolfus Orlandeau. Your journey ends here.
The Thunder God: The hearts of men are black with corruption and must needs be cleansed!
The Thunder God: I call out to the skies and tremble as the brilliance of a thousand bolts blinds mine enemies and tears their flesh asunder.
The Thunder God: Seven shadows cast, seven fates foretold. Yet at the end of the broken path lies death, and death alone.
The Thunder God: Open your eyes to the darkness, and drown in its loveless embrace. The gods will not be watching.
The Thunder God: Misfortune hangs heavy on a head once held high. Such is poor cover for when the heavens fall.
The Thunder God: To the current of life we succumb, its judgment swift and final. Its bite as cold as steel.
The Thunder God: To live by the sword is to die by the sword. There is time enough for regret in the flames of hell.
The Thunder God: Honed is the blade that severs the villain's head. Endless is the path that leads him from hell.
The Thunder God: You will need to withstand far more than this if you are to stand against the likes of her!
The Thunder God: Spirits of heroes fallen, rise! Pass thy judgment on those who would gaze unto the beyond!
The Thunder God: I have been called the god of thunder. You will now know why! Upon my holy blade the very world lies in balance.
The Thunder God: And now the scales will tip!
The Thunder God: That was merely the beginning, Warrior of Light! Merely the beginning!
The Thunder God: They who dwell aloft have spoken. Let their words echo in your empty soul. Ruination is come!
The Thunder God: Even the strongest of shields cannot defend the weakest of wills. A moment's hesitation beckons a lifetime of pain!
The Thunder God: Hark! The screams of ruin rise above the storm's discord. Shudder not in her endless cold.
The Thunder God: The clouds have parted and the skies cleared. It is time I bade you farewell.
Montblanc: Something is wrong... I sense both anguish and rapture, kupo!
Fran: The Mist I sensed before─the aether─its flow is much stronger now. It is almost as if the guardians we defeated were somehow preventing its escape...
Fran: The aether grows thick. She whom we seek must lie beyond this threshold.
Montblanc: You mustn't fear her! Leave that to me, kupo!
Cutscene
Ultima, the High Seraph: Is it sanctum you seek, my wayward children?
Or perhaps you are come in search of power.
Ultima, the High Seraph: That which lies at your feet—that blessed bauble—can grant you both.
You need but will it so.
Ultima, the High Seraph: Now take up your salvation and begone.
Mortal agency in matters divine shall not be suffered.
Duty Dialogue
Ultima, the High Seraph: You shall rue the day you raised your eyes to the heavens.
Ultima, the High Seraph: Denizens of the abyss! From ink of blackest night, I summon you!
Demi-Famfrit: O darkest of vessels! You are my sword! You are my rain!
Demi-Belias: Time waits for no one!
Demi-Hashmal: To maintain order, one must first have control.
Ultima, the High Seraph: Death awaits defiance!
The Thunder God: Honed is the blade that severs the villain's head. Endless is the path that leads him from hell.
Agrias: It is time to end this!
Ultima, the High Seraph: Bare your steel!
Mustadio: She weaves her foul magicks!
Agrias: Only we can shield you from doom! To me, heroes! To me!
Ultima, the High Seraph: Simmer does the light of life before rising to the heavens in a cleansing conflagration of divine benevolence.
Ultima, the High Seraph: You will not intervene!
Mustadio: What is she doing!?
The Thunder God: The barrier will not last! We must stop her!
Mustadio: Is it over?
Ultima, the High Seraph: I am the only god!
Agrias: Such fury!
The Thunder God: Graaaaaah!
Ramza: Now is not the time to stay our blades!
Ramza: Children of Hydaelyn! Make it swift! You are Her only hope!
Ultima, the High Seraph: Few can claim to have endured the might of my will.
Ultima, the High Seraph: Denizens of the abyss! From ink of blackest night, I summon you!
Ultima, the High Seraph: Bend to my will!
Ultima, the High Seraph: I see it now. In you...his blood, my vanquisher in times...long past. But not so soon...shall I accept defeat...
Post—Battle Cutscene
Ultima, the High Seraph: I am your mother. I am your maker! I. Am Ivalice!
Consign me unto darknes and your light will be forever lost!

